A walkthrough for creating a HubSpot private app and linking it to your Acitinar account — captured from a real setup, screenshots included.
Once connected, clicking Sync Now creates or updates, per unlocked company: a Company, Contact records for employees with a verified email on file, and a Deal. Re-running a sync updates the same records rather than duplicating them — Companies are matched by UK company number, Deals by a hidden reference Acitinar creates automatically the first time you sync.
Before you start
Unlike Salesforce, there's no OAuth redirect here — HubSpot's Private Apps use a single access token you copy and paste. You'll need HubSpot admin access and about five minutes.
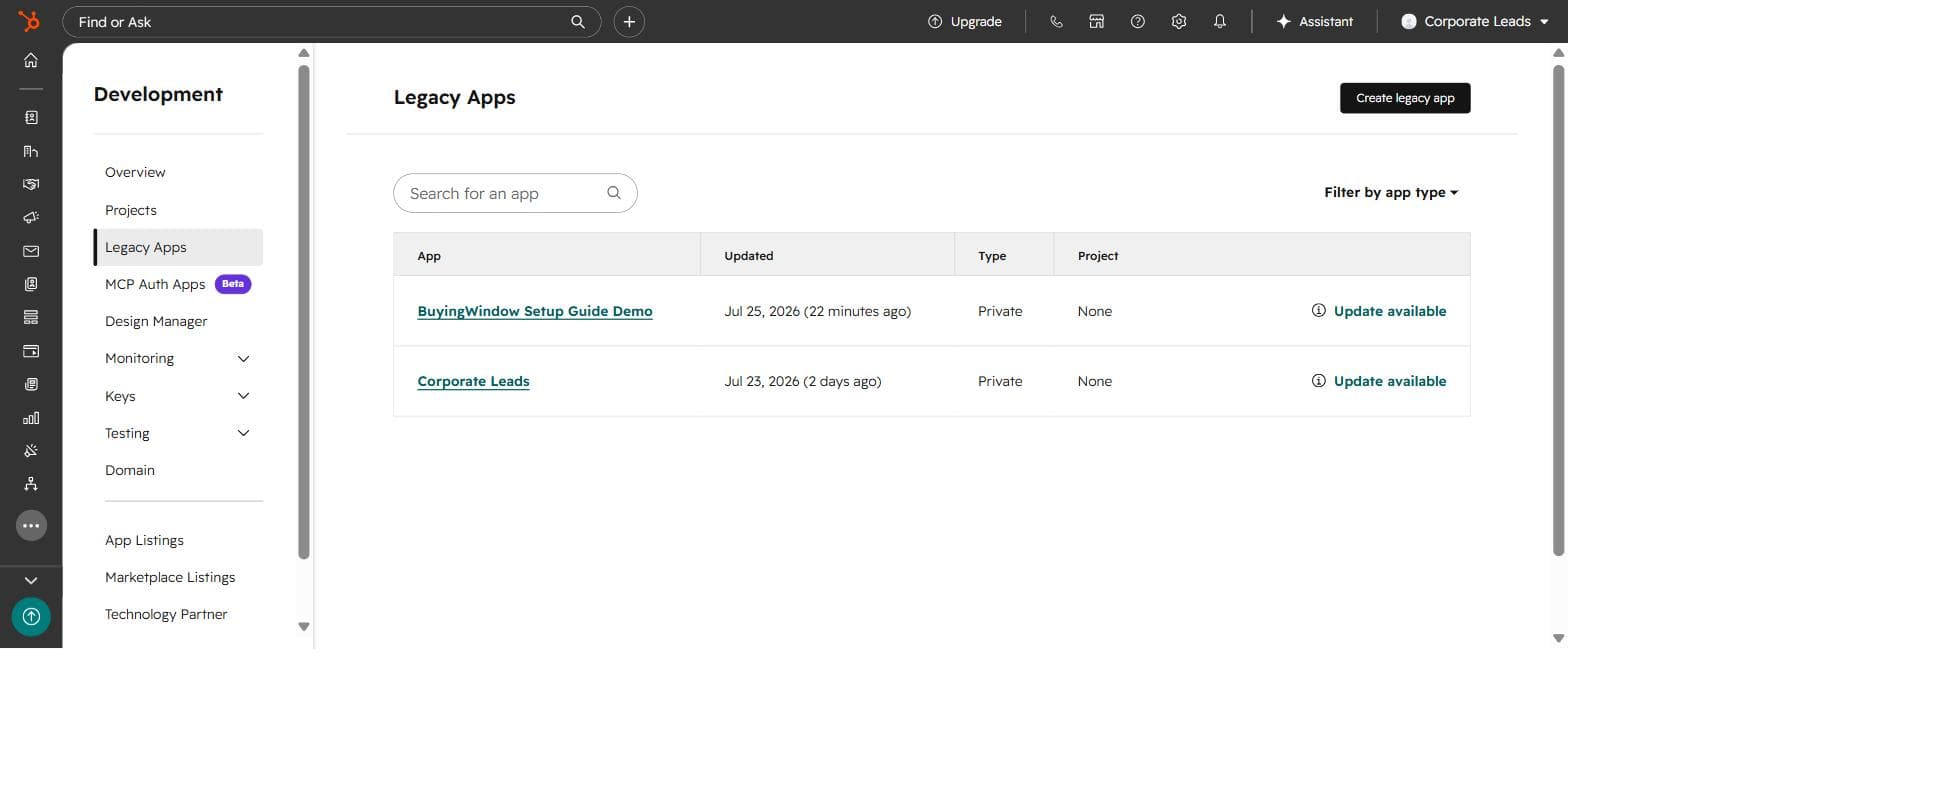
In HubSpot, go to Settings → Integrations → Private Apps(HubSpot may route this through a "Legacy Apps" page first — that's expected, private apps still work exactly the same way). Click Create a private app, name it something you'll recognize, like Acitinar.
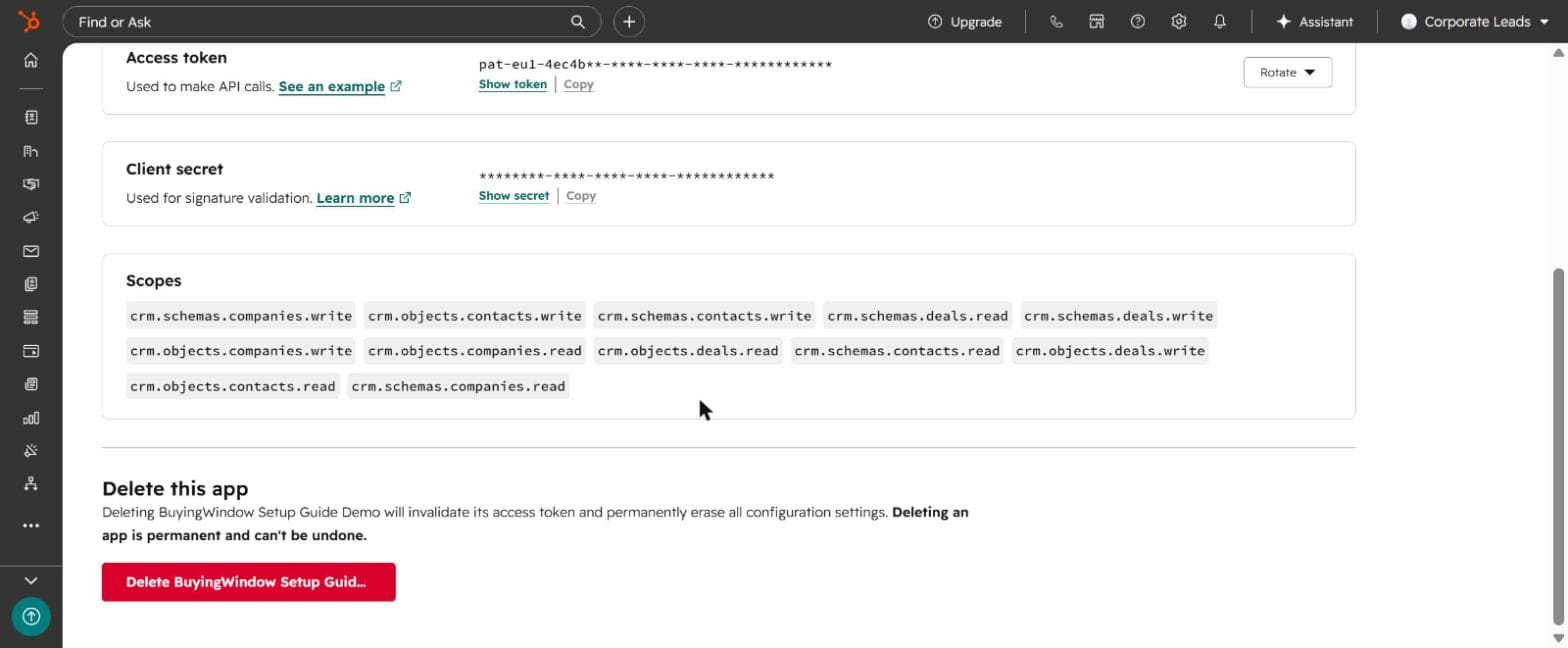
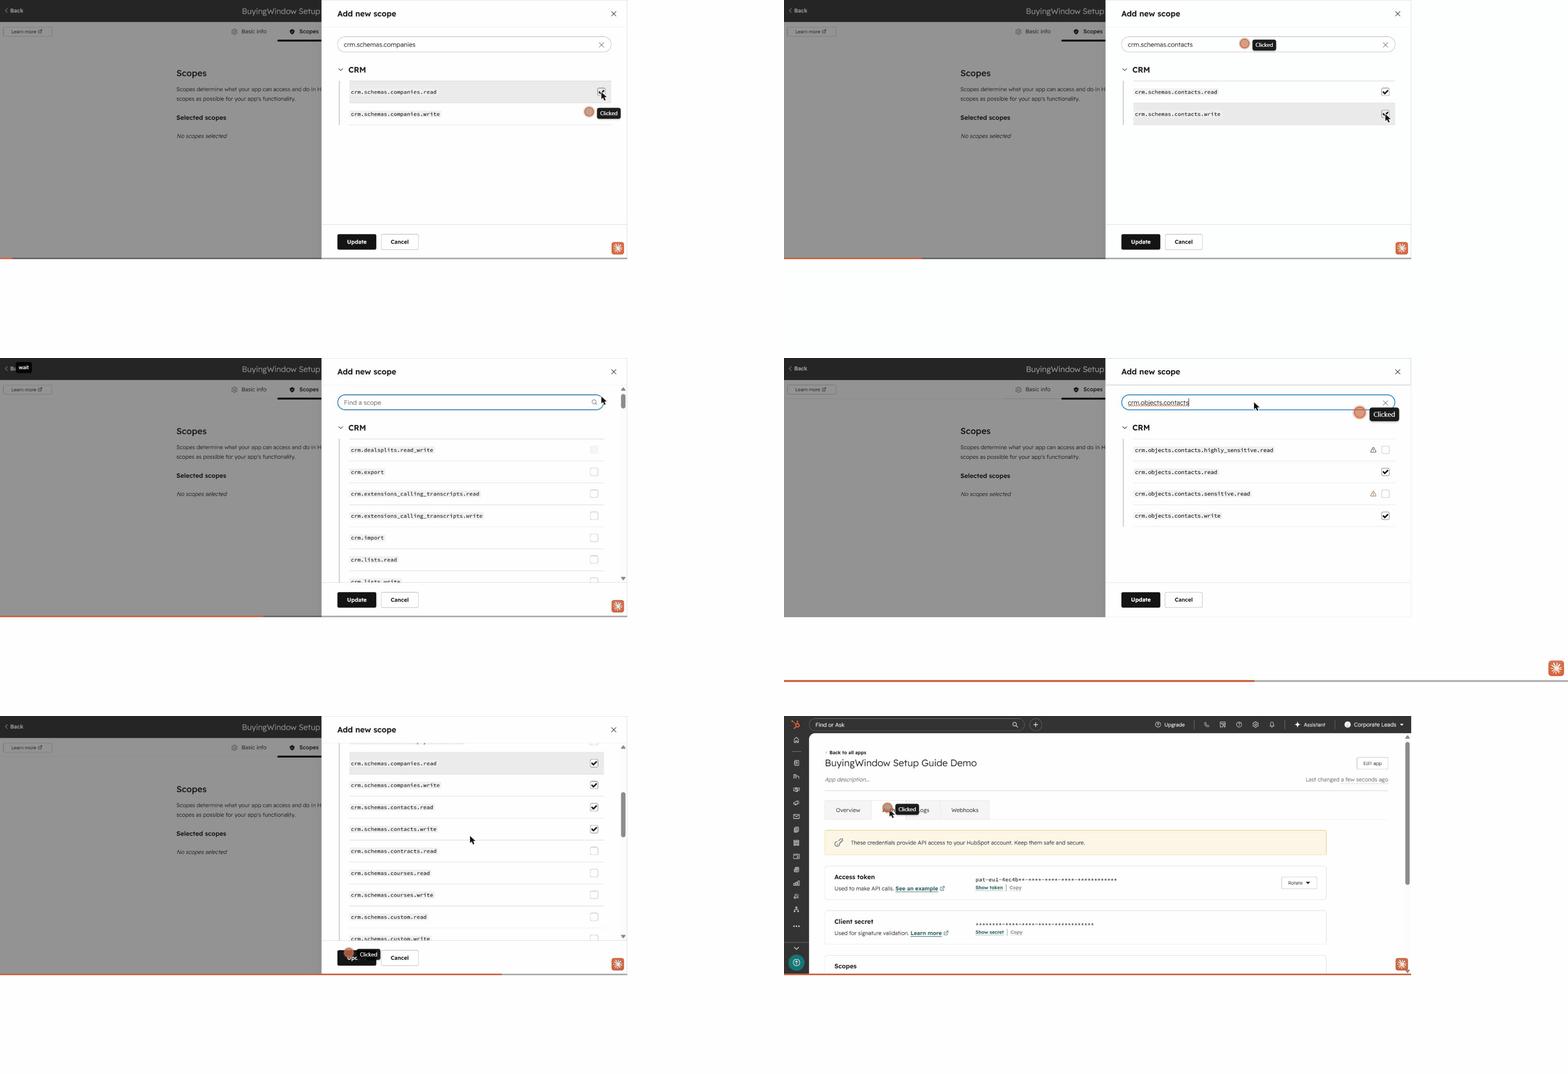
On the Scopes tab, search for and check each of these — all twelve are required. Missing any of the crm.schemas.*.write scopes silently blocks dedup, so re-syncing creates duplicates instead of updating:
crm.objects.companies.readcrm.objects.companies.writecrm.objects.contacts.readcrm.objects.contacts.writecrm.objects.deals.readcrm.objects.deals.writecrm.schemas.companies.readcrm.schemas.companies.writecrm.schemas.contacts.readcrm.schemas.contacts.writecrm.schemas.deals.readcrm.schemas.deals.writeClick Create app once all twelve are selected, then confirm in the dialog that follows.
On the app's Auth tab, click Show tokennext to Access token and copy it — this is what goes into Acitinar, not the Client secret below it (that's only used for signature validation, and Acitinar doesn't need it).
Treat it like a password
Anyone with this token can read and write your HubSpot CRM data. Only paste it into Acitinar's own connect form — never into a spreadsheet, chat message, or public repo.
Naming the app, selecting all 12 scopes, creating it, and the masked Auth tab, captured end to end:
In your Acitinar dashboard, go to Settings → Integrations and open the HubSpot card. Paste the access token in and click Connect— Acitinar verifies it immediately by making a live call to HubSpot, so you'll know right away if it's valid.
Unlike Salesforce, that's the entire connection step — no redirect, no separate login screen. The custom properties Acitinar needs on Companies, Contacts, and Deals are created automatically in your HubSpot account the first time you sync, as long as the scopes above are in place.
Once connected, the card should read Connected:
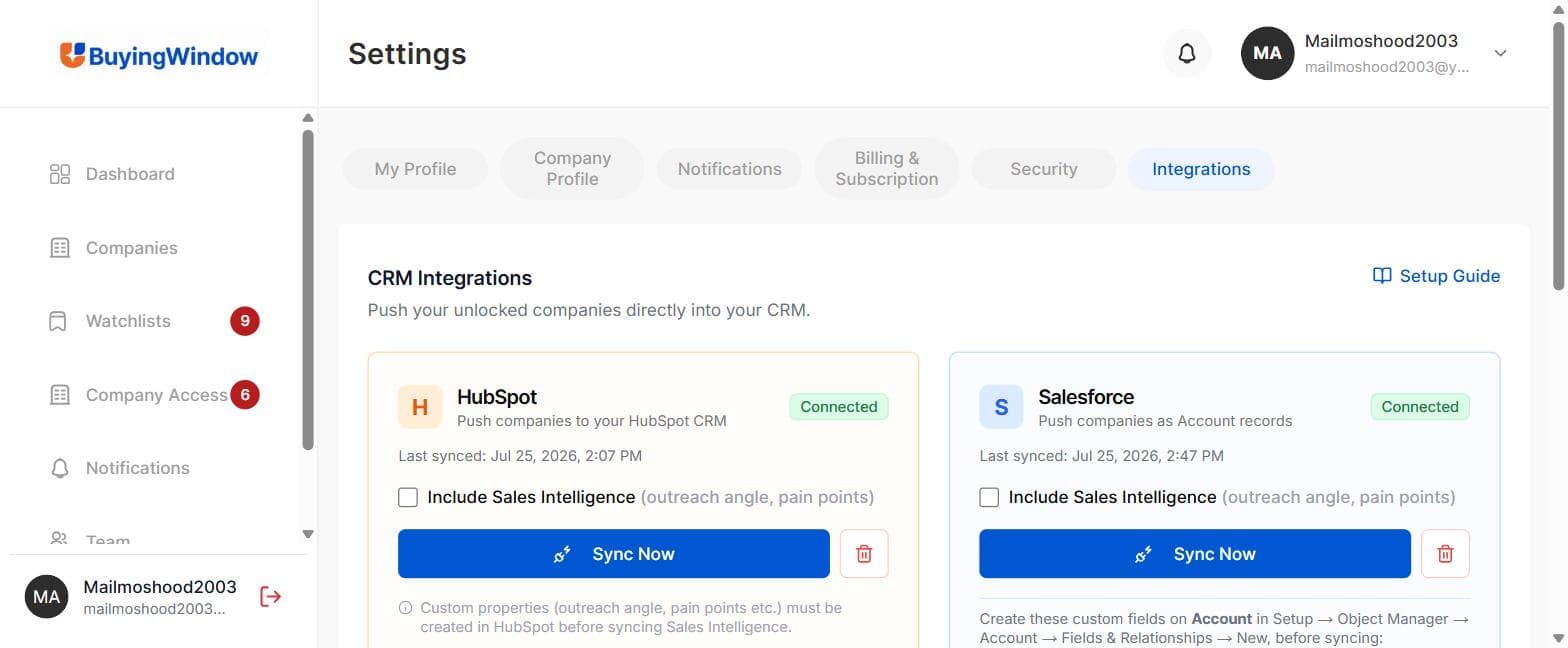
From here, click Sync Now whenever you want to push your latest unlocked companies. Check "Include Sales Intelligence" first if you also want company state, outreach angle, pain points, and likely priorities pushed as custom properties too.
| Symptom | Likely cause |
|---|---|
| Companies sync but Contacts/Deals don't appear | The token is missing one of the crm.objects.contacts.* / crm.objects.deals.* / crm.schemas.*.write scopes — check the Auth tab's scope list. |
| "Invalid HubSpot API token" when connecting | The token was copied with a trailing space, partially copied, or the app was deleted/rotated after copying — go back to the Auth tab and copy it fresh. |
| Re-syncing creates duplicate Companies instead of updating | One of the required scopes wasn't in place on your first sync — fix the scopes, then sync again; matching resumes correctly. |
| Connection stops working after rotating the token | Rotating a token in HubSpot invalidates the old one immediately — you'll need to reconnect in Acitinar with the new token. |